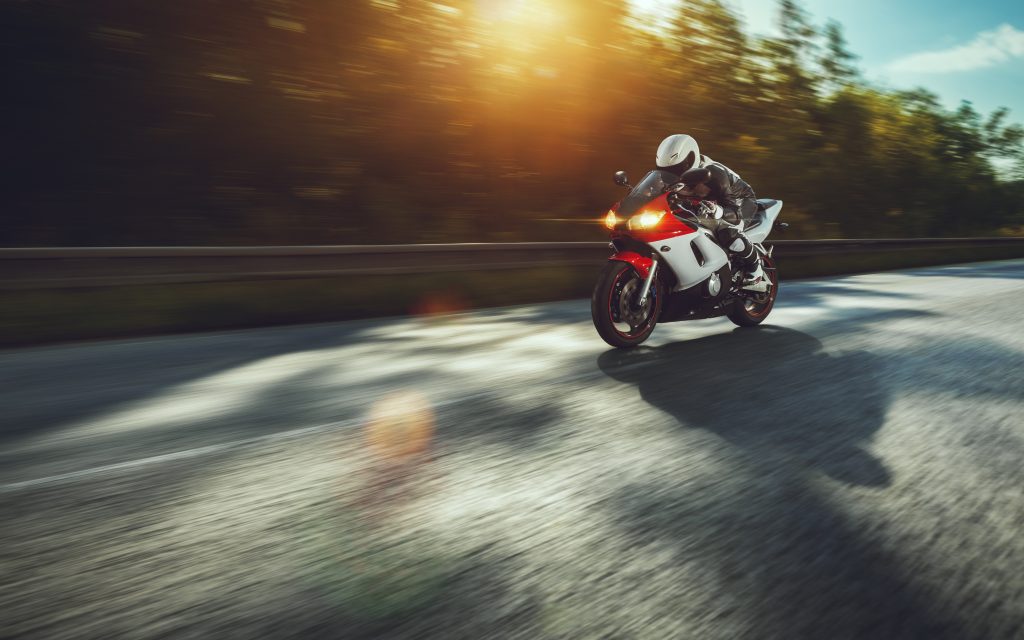
We know motorcycles aren’t any more dangerous than any other kind of transportation on the road. Even so, as an experienced rider, you know that being careful is in your best interests. As with conventional motor vehicles, riding on the highway carries with it its own set of risks and responsibilities. The amount of time we have to respond to an issue is compressed when both us and the other person are driving at high speed.
Tips for Safe Highway Riding
Highway riding is always dangerous, but as a motorcyclist, you know that motorcycle accidents can be a lot more life-threatening than if you’re in a car. Should we avoid the highway then? The obvious answer is no. Usually, the fastest way to get from one point to another is by taking the highway because it’s the most direct route. When we’re on the highway, we still have to be hyper-aware of our surroundings. To ensure we remain safe on the highway:
- Merge Quickly: Entering the highway is the first challenge. Most motorcycles have better acceleration than cars, so your bike should be able to get up to merging speed quickly enough to join the lane. Make sure you keep an eye on the traffic behind you before you enter the lane. The worst spills we’ve ever seen were from not paying enough attention here. Motorcycles have an advantage over cars here since our vehicles don’t have any blind spots. Using indicators when merging is also a good idea to ensure the oncoming traffic knows you intend to join them.
- Maintain Speed Slightly Above Everyone Else: As a preference, most of us enjoy maintaining a slightly higher speed to the rest of the drivers around them. This action allows us to come up on vehicles rather than having cars close distance on us. Moving at this speed also ensures that there’s less time spent in a vehicle’s blind spot making it less likely for the driver to pull into our lane unexpectedly.
- Allow for Lots of Distance: If you’ve ever driven on the freeway, you know that the worse hazards seem to come out of nowhere. Items that drop off vehicles in front of you, for instance, seem to leap out at you as soon as you see them. Unfortunately, if there’s a car in front of you, you’d probably only see them swerving to avoid the obstacle. Give the guy in front of you some space so you can respond to these emergency evasive actions as they happen. Being too close could end in a sudden, brutal accident.
Passing a Car
When you’re on the road, you may need to overtake vehicles now and again, and in our experience, overtaking needs to be decisive. Keep an eye out for mirrors and other things attached to the vehicle in front and try to avoid hitting them since they will throw off your balance. We’re well aware that tumbles at high speed can hurt like nobody’s business.
On the highway, try to avoid overtaking at intersections since you’re never sure when a car may wander into your lane after they pull off from the lights. Keep an eye on the vehicle you’re overtaking and pay particular attention to their front wheels or the driver’s mirrors. We use them to gauge when the guy is looking to pull into our lane unexpectedly.
Road Lanes
The most vital thing to keep in mind with lane positioning is to make sure to have an easy escape route. Be aware of your surroundings and use the fact that your bike can accelerate faster than cars to your benefit. The lack of blind spots on a bike is also a plus since we can see all the cars ahead of and behind us easily.
The left or right sides of a lane are better for positioning. You’ll notice where other car tires have passed. Try to keep yours in the same general area. The center of lanes usually has debris or oil residue, which can lead to picking up a skid. We’ve seen, on a few occasions, courteous drivers pulling to one side or another to give us more room to pass. However, even if they don’t, a bike should have enough space and time to attempt overtaking them if you position yourself correctly.
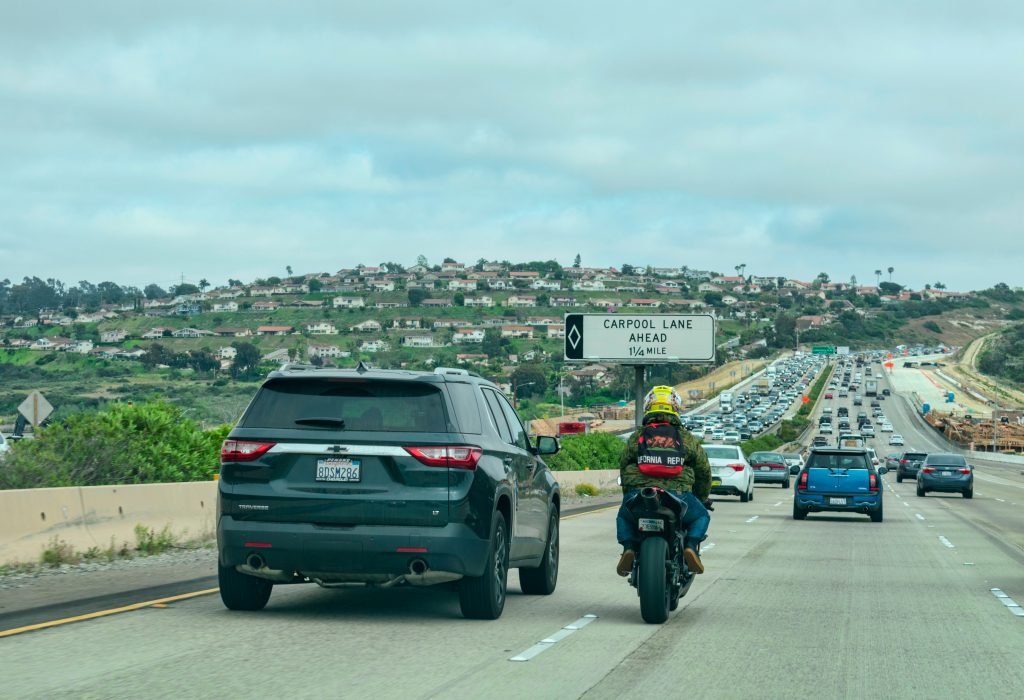
Lane Splitting
You’ve probably heard about all the discussion going on regarding this issue around the country. Lane splitting is when a motorcyclist rides between lanes of traffic when the cars in those lanes are moving slower than optimal. It’s also called “white lining” in some places since the motorcycle follows the white line as it moves between the lanes. Lane splitting happens only on lanes that are moving in the same direction. That should be obvious, since trying to hold the white line between two opposing streams of traffic is suicidal.
The Legalities of Lane Splitting
To date, the only state that has explicitly made an allowance for lane splitting is California. Utah has also implemented favorable laws for lane splitting. Both Washington state and Oregon are considering legalizing lane splitting, but all the other regional governments haven’t really taken a stance on the issue. It’s a shame more states aren’t proactive about the practice since lane splitting is a great way to save time, fuel, and keep us riders safe. Europe has already made it legal for motorcyclists to lane split, but the US hasn’t gotten the memo on how helpful this practice could be, apparently.
Extra Tips when Lane Splitting
Lane splitting isn’t a risky practice if you have a little bit of practice. There are a few things you should pay particular attention to when it comes to lane splitting:
- Appreciate your size. Does your bike have forwards, panniers, fairing, wide bars, or engine bars? Your size estimate ought to take into account those extensions then add two feet to it.
- Monitor your Speed. You don’t want to be going too fast since you’re at more risk of a collision. Instead, keep an eye on your speed and adjust to make sure you remain in control.
- Pay attention to roadways. Roadways can lead to potential danger when combined with traffic. Uneven surfaces or those covered in debris or slick can make for treacherous riding.
- Be careful in wet conditions. Lane splitting in the rain or snow is a much more challenging affair. Painted lines have less traction than blacktop, and to avoid picking up a skid, keep your speed manageable.
- We know how hard keeping under the speed limit is, but while white-lining, it allows you to have better control. Stick to within 15MPH of the surrounding traffic.
- Keep an eye out for fellow riders. You might not be the only one white lining, and it’s better to be aware of the rest of us while you’re making your way through traffic to avoid collisions.
- Don’t rush drivers with their turn signals on. Don’t be that guy who cuts someone off in traffic after you see their turn signal. Letting them merge might cost you five minutes, but it’ll get you some gratitude from the driver.
Safety is Vital for Bikers
As a rider, you know how important it is to keep your motorcycle in good shape. That means avoiding getting into pointless accidents. Keeping safe is a matter of habit. Once you get used to them, you never even think twice about paying attention to them. In white-lining, safety could keep you and your bike from an unfortunate accident.
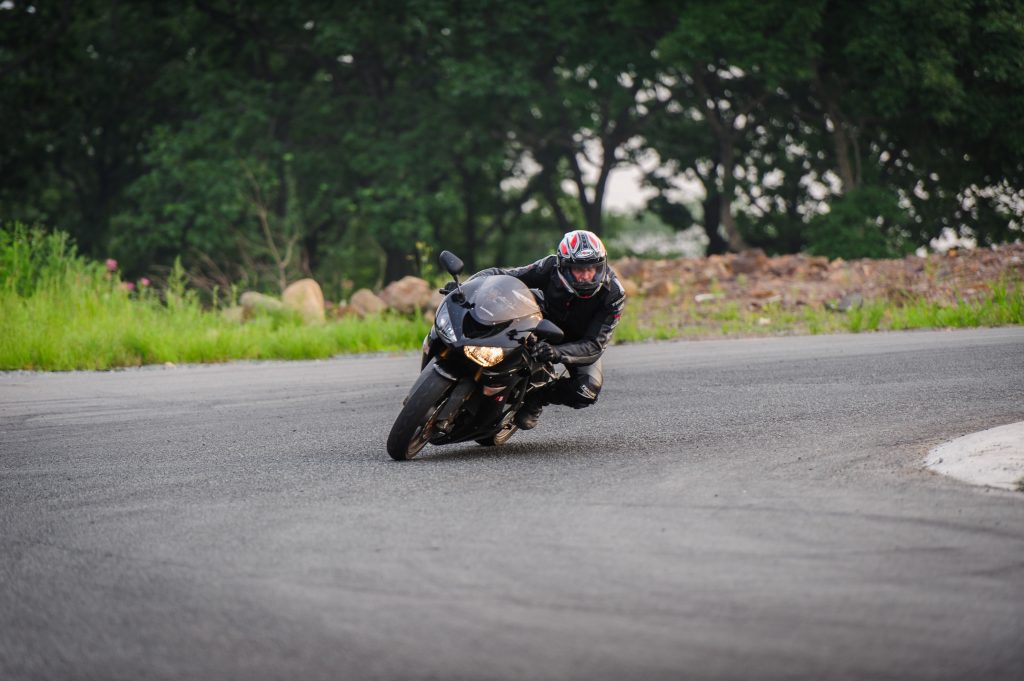
How to Corner Better
By now, you know that motorcycles can be complex mechanical beasts to get the hang of. Cornering is a fight for control between the forces acting on the motorcycle, and you, trying to keep it moving the direction you want. We’ve been in some nasty spin-outs from bad cornering, and we wouldn’t wish that on anyone. Cornering in a motorcycle is a vital skill, but it’s one that takes a LOT of practice to get right. The type of cornering that you’ll be doing depends almost wholly on how fast you approach the corner.
Counter Steering for High-Speed Turns
Counter steering is also called positive steering or active steering. We’ve participated in the long-running debate on what you call this particular stunt, but whatever you name it, it remains instrumental in managing high-speed turning. The first time someone explains it to you, you’ll probably tell them that it’s the silliest thing you’ve ever heard. On first listen, it makes absolutely no sense. Counter steering says that when you enter a turn, you need to lean in the direction of the corner and steer away from it. In short, you push the handlebar to the left to turn left, and push it to the right to turn right. For us, it took a LOT of getting used to. To perform the perfect counter steering maneuver requires a little bit of know-how.
- Relax your arms: You should be pushing close to 90-degrees to the steering axis rather than pushing directly down on the handlebars. The relaxed arms make for less force against the bike’s movement and allow the vehicle to continue on its normal trajectory.
- Grip with your legs: Your arms will be relaxed, but that just means that you need to grip the vehicle with your legs for added stability. Additionally, you may want to use the heel of your boot to help anchor your foot to the pegs.
- Push on the bar: The bike’s turning is a reflection of the circular force acting towards the center of the turning circle. Before that force can start to take effect, roll the bike’s angle to a less lateral one. That lean is initiated by your pushing down on the bar.
- Release the bar and ride the turn out: Once you get to the desired angle of your turn, release the pressure on the bar. The motorcycle will hold its trajectory because of the turn’s force acting on it.
- Think about the corner and follow-through: You should always keep in mind your entry, apex, and exit points for the turn. These will make you into a smart rider and free you up for the next corner.
High-speed turning, like what you see in racing, is typical for maintaining the bike’s speed into and out of the turns. Practice makes perfect when it comes to taking corners. We had to spend months before we could quickly spot entry, apex, and exit points. Taking a turn at low speed requires a slightly different dynamic.
Counter Weight for Low-Speed Turns
The reason why counter steering works is because the turning force generated by the speed and motion of the bike at high speeds keeps it in motion. You’d probably realize that if you were taking a curve at low speed, the same principles wouldn’t apply. Things become a bit more intuitive at this stage. Instead of counter-steering, you pro-steer. This means that you’d turn the handlebar in the usual direction for a turn with any other vehicle. Instituting the turn requires understanding the principle of counterweights.
Typically, you’d only use counterweight when moving at or below 12-15 MPH. Counterweight is a low-speed technique that allows for tighter turns and is great for if we don’t have the space to make a wide-angle turn. It does this by ensuring the bike leans more into the turn, using your weight to push the bike into the corner. You exit the corner at a tighter angle, even though you sacrifice the speed to do so. Counterweight turns have their own procedure:
- Shift your weight: As you enter the turn, you need to shift your weight to the outside while maintaining the same speed that you already have. You shouldn’t be moving faster than 15 MPH. You’ll be using your legs to impart weight on the outer peg to control the turn.
- Manage your handlebars: These should never come to a full lock.
- Draw up your knee: For a tight turn, you want to have your knee drawn up to the vehicle’s body, near the tank, and the saddle. Having your knee in that position gives you a lot more control over the turn, and that’s what we want – control at low speeds. Sticking your knee out moves your weight inwards and makes it easier to misbalance.
- Keep your forearm square with the throttle: Fine control can be done by keeping the vehicle powered through the turn. This only works if you maintain constant power with the throttle. Even if you don’t opt to keep the throttle steady, you can still turn the vehicle slightly if you please.
- Keep your head up: Your head and eyes should always be pointed to the exit of the turn. If you’ve ever taken a turn and been surprised by something coming out of it, you need to keep your head up to spot those problems early.
Hitting the Proper Apex Consistently
We define the point of a turn closest to the inside of the track as the apex or clipping point. Usually, the apex is around the middle of the corner. However, depending on how you take that turn and the shape of the road, the clipping point may vary. Some are closer to the start of the corner, while others are further back, near the exit point. Hitting the apex each time takes a lot of practice. Here are some of the things we picked up while learning how to apex every corner:
- Keep your eye on the apex: At the entry point, your vision should be lined up with the turn’s apex. Your eyes are your guiding line for taking the corner, so you want to keep your eye on the apex throughout the corner.
- Get to the Apex: As you take the turn, the space between your vehicle and the apex will gradually decrease. You don’t have to keep looking at the apex. All you need to do is to ensure that you’ll be hitting it with your current trajectory.
- Look at the exit: As soon as you’ve confirmed your vehicle will be hitting the apex, your eyes will need to move. You’ll have to start looking at the exit to the turn.
Cornering is an Essential Skill
Taking corners is something bikers need to learn to do at both high and low speed. Cornering on a bike is like learning to walk. Without it, you might get places, but you’ll end up with a lot more bruised knees. It’s also a skill you’ll need if you intend to go canyon carving.

How to Ride Safely on the Canyons
If you’ve never done canyon carving, you have no idea what you’re missing out on. When you carve a canyon, you try to take the canyons as efficiently as possible, swinging in and out of corners while keeping your head up for dangers that lie in wait. As exciting as canyon carving is, you still have to be aware of your safety on those roads. Unlike open highways, canyons usually have sheer cliffs on all sides. Taking a turn badly or not paying attention to your surroundings could put you in a world of hurt.
Bikers tend to love canyons because of the thrills and dangers they provide. They require a lot of technical skills and the ability to adapt to changes in the road at a moment’s notice. It’s a ride that tests your skill, adaptability, and endurance. No matter how skilled you are, though, you have to understand how to manage your risks. The reason why some of us don’t come back from canyon carving expeditions is that we get cocky and forget basic safety. Here are a few tips to make sure that you’re able to carve those canyons without any mishaps happening on the way.
1. Riding Speeds
Speed limits are no fun, but good safety says that we can’t just ignore them. Canyon carvers often find themselves running afoul of cops located up on those twisty roads to stop people from speeding. There’s a reason they stationed themselves there as well – for the safety of those on the road, including us bikers. The faster you ride, the less control you have over the bike. All it takes to make a bad turn into a skid is a little handful of debris in the wrong place. You can’t control skids, and there’s nothing that would stop you from running into an oncoming vehicle at speed. We can attest that on some of those canyon roads, traffic is scarce. If you do get hurt, it might be hours before anyone passes by to help.
Smooth throttling is also something you should do, not just because it helps with fuel efficiency. Throttling up in rough increments can destabilize your bike and lead to you losing control. Inside of a curve, it’s best to keep your throttle steady, since letting up on it may cause a front-end-dip and make you lose traction with the rear tire. If you’re opting for safer, tighter cornering, you’ll want to control your speed using brakes before entering the turns. You can take open corners at pace, but you should never speed into a blind corner.
2. Stay In Your Lane
If you’re going canyon riding in one of the less frequented areas, it’s tempting to use whatever space you have on the road. Resist that temptation. Canyon roads are notorious for being hard to see around corners. There are so many dangerous bends that all it would take for someone to run into you would be a mistimed lane switch into oncoming traffic too fast for them to stop or swerve.
The center divider line is also a no-go-zone. You can’t be responsible for other drivers, and some of them just aren’t as good as we are at keeping their vehicles in their own lane. By riding the white line, you put yourself at unnecessary risk. It’s far safer to hug your lane. You will have to spend some more time on your high-speed turning, but we mentioned how you could do that earlier on.
3. Be Aware When Overtaking
Overtaking on a regular road is already dangerous. With limited visibility around corners on canyons, we try to take extreme precautions when overtaking. Canyons don’t have a lot of straight stretches that you can overtake on. However, they do have nice, wide corners that can give you a bit of space. Bikes already have better acceleration than a car, so getting up to speed quickly isn’t an issue. You need to be decisive and ensure that you have enough space to perform the maneuver. Keep an eye on the car ahead of you, but don’t focus on it. Just ensure they don’t inadvertently clip you as you move past them.
We’ve never met any driver that appreciates someone riding their bumper. You should avoid doing that at all costs when overtaking. Your gear changes can help you to push you past cars without needing to stick close to their rear end. Start in a low gear to switch to a higher one to get the maximum torque from the gear switches. You should be looking for a gear that gives you a nice, smooth, instant kick, and you should start overtaking a few thousand RPM below the redline. You want to pull out, check that the coast is clear and accelerate. However, you want to avoid doing so in areas where you can’t tell if you’ll be running into trouble at the end of the curve. Visibility is a key element to successful overtaking within a canyon.
4. Apexing the Turns
We covered this in detail previously, so we’ll focus on the essential strategies for canyon carving. Canyons are difficult to traverse as a biker because of the sheer number of corners we have to face. And they’re not dull corners either. Besides the dangerous blind corners, you’ll find off-camber, double apex, delayed apex, and a whole slew of others.
Entering the turn, you should be able to see the line that you intend to take, from entry to apex, to exit. You want to open into these turns as full as possible without crossing over into the other lane. This method gives you maximum visibility of the curve and might even allow you to spot the exit or the second apex in a double-apex curve.
If you have two continuous curves to take, you should enter the curve the same way you would any other curve – as far wide as possible without crossing the white line. When you hit the first corner’s apex, you should hug it longer to line you up to enter the second corner seamlessly. Exiting the first corner is entering the second corner. We spent a long time practicing before we managed to get this right.
For corners that curve away from your direction of travel, you need to be extra careful. Entering into those curves can leave you exposed to the opposite lane. You may want to start those curves with this in mind and maybe take them a little shallower. Leaning into a corner with your head and shoulders exposed to oncoming traffic could end badly.
5. Additional Safety Tips
Cornering and positioning can only get you so far when canyon carving. A bike is your closest ally in taking these corners. If you take care of it, it’ll take care of you. That’s how it’s always been with each of our bikes. Before setting out, you should check your tire pressure to ensure that you won’t have any trouble with them on the way up. You probably know your tire inflation values by heart by now, but glancing online for what the manufacturer recommends is a bad idea. Manufacturers recommend a certain PSI for their tires but it is only for their tire to perform for ultimate mileage, Manufacture PSIs are too high for the canyons, Typically they recommend their max PSI which in most tires varies from 42-45 PSI. Most common PSI would be 34-36 PSI on the Front and 32-34 on the Rear for more street DOT Tires, If you are doing canyons it is recommended to lower 1-2 PSI on both tires. Take a test lap before you head into the canyon, just in case something decides to fail. If the bike stutters or has a throttling issue, then you should check it out before going into the canyon. It might postpone your expedition, but safety is better than sorry.
No biker wants to run out of gas on their way through a canyon. Check your gas gauge (if any) or open your gas tank to check your gas left on your tank. Planning is vital for long trips like these. Don’t overlook things like food and drinks. At the same time, don’t overburden yourself since weight impacts how well your bike handles. Travel light, but travel smart.
Not a Pastime for the Wary
Canyon carving is, at its heart, a daredevil hobby. Canyon carving values speed and skill, but it should also value safety. It doesn’t matter if you made a great time up the canyon if you don’t make it back down. Play it safe today so you can keep canyon carving tomorrow. But playing it safe doesn’t only mean the way you approach your canyon carving. It also applies to the gear you use to protect yourself.
Proper Safety Gear for Riding
As a motorcycle rider, you know how dangerous it is to be riding without proper safety gear. We’ve learned that, while safety gear is important, having that gear fit properly is even more important. Having a good fit for safety apparel ensures that it covers the vital parts of your body and protects them if you fall. We’ve found that many bikers we’ve met don’t have any real criteria for their safety equipment. After your first crash (if you manage to avoid serious injury), you start to realize that selecting the right safety apparel isn’t as easy as it first looks.
Fitment Affects Safety Performance
When you choose a piece of motorcycle safety equipment, you should be looking at how well it performs based on others’ opinions. Online reviews at motorcycle apparel sites can help you figure out whether this particular piece of equipment is worth buying. The catch is that if it’s not fitted correctly to you, it can be nearly useless when an accident happens. Just having safety equipment isn’t enough to prevent severe injury. How that equipment fits is also of significant concern. Here we’ll explore the proper safety gear for riding, and in each category, we’ll offer some tips for knowing if your safety gear fits properly.
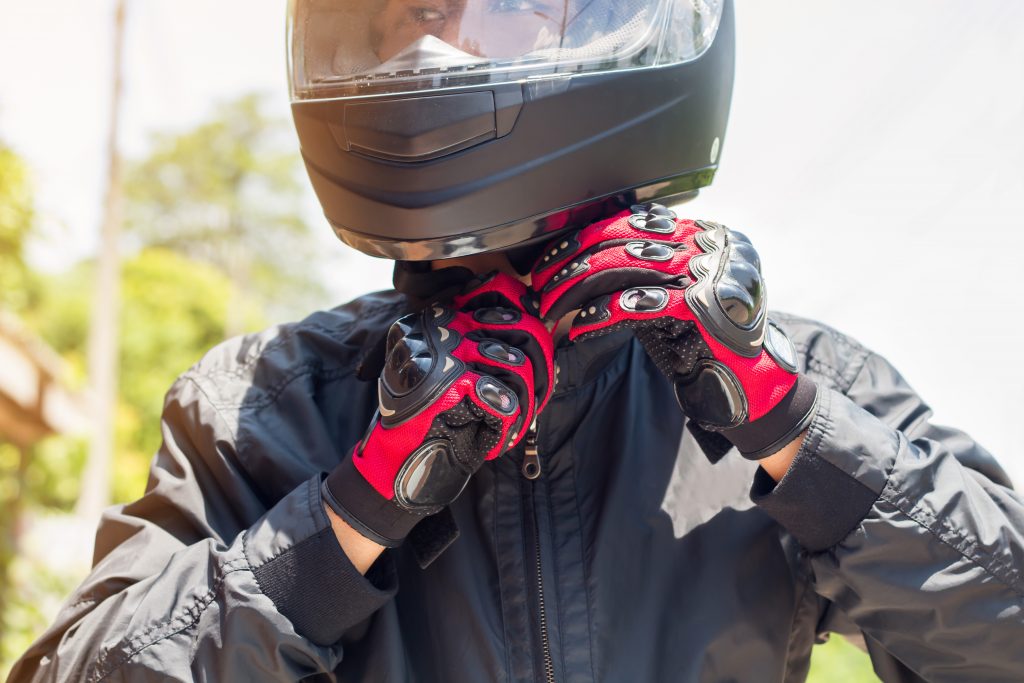
Helmet
Your head is one of your body’s most critical parts to protect if you end up in a crash. Helmets come in three types:
- 1/2 Helmet: These provide minimal protection, with an open face and cover to your head’s top and sides. Bikers usually use them with goggles or glasses.
- 3/4 Helmet: These offer a little more protection, with coverage for the side, tops, and back of your head and a pull-down face visor. They don’t cover your chin at all, and facial coverage is minimal
- Full Helmet: These offer the best protection and cover your entire head.
All of us have different head shapes, and the fit of your helmet should take your head shape into account. When measuring your head for a motorcycle helmet, you’ll want to take the reading around the broadest part of your head – just above the ears, and nearly a half-inch over your eyebrows. The measurement is similar to if you’re getting a fitted hat. The first time you slip on a new helmet, the fit should be snug, but it shouldn’t exert excess pressure or cause pain. After a while, it becomes a little looser to the fit, but it should never become so loose that you could twist it to the side. An adequate fit for your helmet ensures that you have the most protection in case you ever get caught in an accident.
Gloves
Gloves need to enable your hands to move freely, but not become entangled because of its movement. The gloves you can buy usually come in three material categories:
- Leather: Leather gloves tend to be more expensive than other options, but the fit they offer once broken in is unmatched. Breaking in a leather glove allows it to mold to your hand for a much better fit as well as superior protection.
- Textile: Textile options tend to be better for if you’re riding in extreme temperatures. We’ve found that they’re also very versatile when they can be worn. Most bikers choose textile gloves, so they have an all-purpose riding glove. Textile gloves don’t mold to your hand’s shape, so the fit when you buy them will remain throughout the life of the glove.
- Hybrid: These combine textiles and leather strategically. Leather is added to areas where slide protection is needed while textiles make up the comfort element. They can be the best of both worlds.
The glove fits for motorcycle breaks down into American and European glove sizes. American glove fits leave a bit of space around the palm and fingers and demonstrate shorter finger length. European gloves have longer, thinner fingers, with less room around the palm for a tight grip. When fitting your gloves, your hands should fill out the digits entirely. There shouldn’t be any excess loose material anywhere on the glove.
Boots
Choosing boots for motorcycle riding is not as complicated as other safety apparel. We find that, instead of a regular shoe, motorcycle boots need a little space in the toe region. If you’re riding for an extended period, your toes get pushed into the front of the boot. Without the extra space, it’ll make your feet feel like they were in a vise. On the other hand, you don’t want your boots to be too loose either. If they are, they’ll come off in a crash and wouldn’t matter if you were wearing them in the first place. Motorcycle boots tend to have a reputation for being hard to get on and take off, but for a good reason. You don’t want to lose them if you catapult off your bike seat in a crash.
Pants
When you’re looking at trousers, your options are usually either motorcycle pants made of leather or textiles or riding jeans. We find that motorcycle pants tend to give excellent protection, with leather pants giving better armor, but textiles offering more freedom of movement. Riding jeans are different from regular jeans in that they’re made to be more durable and come with cooling and wicking built into their design. The fit should be snug, but not restrict movement. While you might think that you know your pant size by now, you may want to double-check it. Getting the right fit for maximum protection requires your pants to fit well on your body, so getting the correct measurements is necessary.
Jackets
When buying a jacket, the sizing of the clothing is essential. The coat should fit firmly on your body, snug but not tight. If your jacket starts flapping around like you’re smuggling a seagull, you may need to get one that fits you better. Some bikers opt for thermal liners, but if you do, you should ensure that the jacket maintains its firm fit when you take those out. Aim for jackets with slightly longer sleeves so that you’ll still be able to reach your handlebars after putting them on. Jackets can get smaller as you grow, so getting those with adjustable straps might be in your best interest. We grow attached to our jackets, but that also means that you don’t want it getting too tight on you. In a crash, the impact could split a tight jacket, and not only would you get hurt, but you’d lose your favorite jacket.
Armor
Most motorcycle pants and jackets come with armor built-in to protect your joints. The armor padding shouldn’t be snug against your body but should be free enough to allow you natural movement. They shouldn’t be plates that are awkward to move under. You can test the placement of the armor by rotating it. If it rotates off your joints, then you need to reorient them, so they provide better protection. If the armor moves more than an inch in either direction while you’re seated on your bike, it won’t help you in a crash. If you need to adjust your armor, you can buy inserts and replace those that are already in your pants and jacket. External armor can add to your protection, but these should be sized to be firm on your jacket to get maximum value from them.
Good Fitment Counts
Bikers have a reputation for being sleek and efficient when we dress. It’s not just because our clothes look awesome (even though they do) it’s because safety is part of our fashion statement. We don’t carry around excess weight, not do we spend time on weird buckles and clips. What we put on, we use. Efficiency is our jam, and the same can be said for when we maintain our bikes.
Standard Safety Inspection for a Bike
A bike is only as good as how well you maintain it. If you spend time on her, she’ll make sure you get where you’re going. Many of us already know about the t-clocks (TCLOCS) inspection checklist – “Tires, Controls, Lights, Oil, Chassis, and Stands.”
Before inspecting your bike, you’ll have the factory service manual for your make and model of motorcycle handy. Also, give her a bath, since it’s easier to spot problems when you don’t have to wipe grease and dust off the chassis. Here’s a quick rundown about how the TLOCS checklist works:
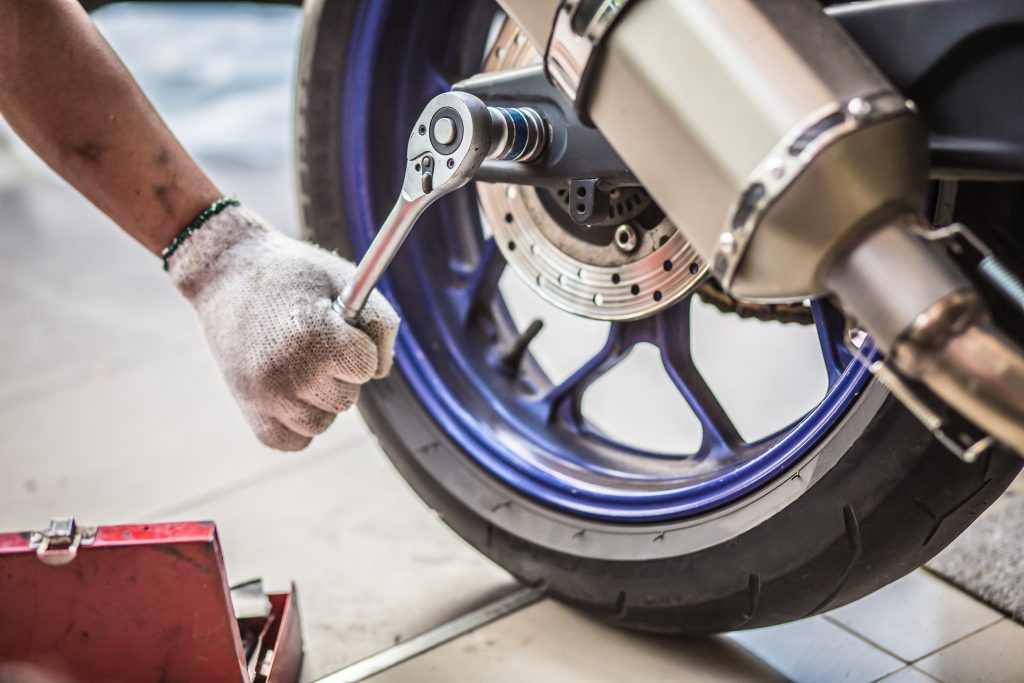
T – Wheels, Brakes, and Tires
Tire tread is our first stop in this inspection. A lot of newer tires have wear bars set within the grooves. When these become flush with the tire surface, it’s time to replace the tires. As a general rule-of-thumb, you should be looking at 1/32″ as an acceptable depth for your grooves.
Keep an eye out for cracks, and bulges, since they are a telltale sign that the tires are worn or old. Take a cursory check of your tire air pressure to ensure that they aren’t too soft. Over the winter, tires tend to lose air. If you’re doing this in summer, you may need to ensure that the tires have their expected firmness for a good ride.
For the next inspection, you may have to elevate your bike onto a stand so that the wheels can spin. Check for bent, broken, or missing spokes since these can throw off your balance. If your rims are cast, look for dents and dings that may lead to poor balance. Spin the wheels and check if you see any wobbling going on. If it’s wobbling significantly (more than 1-inch deviance), you’ll need to replace it. Twist the tire back and forth, and if there’s excessive give, it means your wheel bearings have failed and need replacement. Give the wheel a spin, and listen. There should be no grinding or growling noises as it turns.
Finally, you should check your brake pads to ensure that they conform to your service manual’s minimum requirement for thickness. If you have to replace them a little sooner than expected, don’t beat yourself up over it. It’s better to have secure brakes when you need them than worrying about stopping. Spin the wheel and engage the brake to ensure that it has the stopping force to make the wheels stop completely.
C – Controls
Check that your handlebars are straight and can turn freely and that the ends of the bars are secure. Your levers should also be tightly mounted. Lubricate the levers if they feel stiff and trace the cables to ensure there isn’t any fraying or cracks. While tracing, make sure the cables are correctly routed. If your cables are the stock cables the bike came with, chances are you don’t have to shift them around.
Roll on the throttle and hear how she responds. The throttle shouldn’t stick open or snap closed on its own. Finally, when you’re checking the handlebars, readjust your mirrors to give you the right range of vision behind you.
L – Lights & Electrical Systems
If you’ve ever left your bike parked up for summer, you’d know that batteries run down when you don’t use them. An electrical check should come before any ride, not just the ones you’re having after a long hiatus. A cheap multimeter can help you test the voltage on your batteries. If your battery isn’t a sealed, maintenance-free type, consider topping up your cells with distilled water.
Turn on the lights to make sure that they work and press on the brake to make sure you don’t have any blown bulbs. If the lights aren’t working, you may need to troubleshoot before replacing anything. Wires can become frayed, or you might have blown a fuse. Go through these before deciding to replace the bulb altogether.
O – Oil and Other Fluids
While bikes aren’t the same as cars, changing the oil regularly is a recommended practice. We usually do it at least once a year, but more often if you do a lot of riding. If you have replaced your oil recently, then you should still check the levels. Nothing destroys an engine faster than failure in lubrication. Other fluids you should also check are coolant fluids.
When refilling your fluids, make sure you don’t mix liquids of different DOT levels. Stagnant fuel can also be a concern and something you should check for. It’s in your best interest to drain out the old gas and refresh it with a new tank if the bike has been down for a significant length of time. If your bike’s engine is running rough, you might want to clean the air filters and injectors.
C – Chassis
Your bike goes through a lot of stress in a single ride, and the vibrations sometimes lead to her chassis getting cracked or damaged. Chassis inspections allow you to spot cracks and fractures on the bike. You can test the head bearings by twisting the handlebars from stop to stop. If there’s resistance or grittiness in the movement, those bearings need to be replaced.
Raise the front wheel and test the forks by pushing and pulling. They should remain stable, and if they don’t, your bike should see a professional. Check your fork seals for signs of leakage. Have you done an oil replacement recently? We usually replace our fork oil once a year or every 10,000 km (whichever is sooner). Rest some of your body weight onto the fork. It should have a smooth resistance and not bottom out. If it does, you need to inspect your fork more closely.
To the back, you need to check that the shocks give you reliable support. Raise the rear wheel and inspect the swingarm. If there’s play on it, your bushings need replacing. Run through the chains, belts, and shafts as you see them and check for wear and tear.
For chains, keep them oiled and make sure there’s no slippage in their movement. Finally, go over the bike and look for telltale signs of cracks. Raised paint is a dead giveaway for those kinds of problems. Ensure you tighten every nut and bolt you find to keep vibration to a minimum while on the highway.
S – Stands
Stands are usually the last thing you worry about on your motorcycle because they won’t help you stay on the road. Still, a gummed-up stand looks terrible, and since you’re already in maintenance mode, it’s worth checking. Shift the stand to make sure it actuates appropriately and give it a good dollop of grease to keep it lubricated. Kick it down a few times to make sure it responds well, and that should do it for stand maintenance.
Avoiding Accidents is Your Business
Being a biker has many risks, but the rewards are so worth it. You can try to keep yourself safe by following proper practice, but it doesn’t always work out that way. We understand that accidents happen, we’ve been there ourselves. If you got into an accident and would like to explore your options, let someone who understands how it is to be a biker help you out. Give Torklaw a call today, because if bikers can’t stand up for bikers, who can?